
How to automatically repair problems in Windows will be described in this article. Users occasionally encounter problems with Microsoft Windows, such as startup issues, performance issues, or error messages.
How To Automatically Repair Problems In Windows
In this article, you can know about How To Automatically Repair Problems In Windows here are the details below;
Fortunately, Startup Repair or Automatic Repair, a built-in feature of the majority of Windows editions, can resolve these problems without reformatting. Your issue might have better or quicker solutions.
Before continue, make sure to browse our website for further potential solutions. Select your Windows performance from the list below, look over your options, and then adhere to the directions to continue.
Windows 11

- Startup Repair – When your computer has problems starting up, choose Windows 11 Startup Repair.
- Use the methods listed below to access it.
- Change advanced starting options can be found by pressing the Windows key, typing, and entering.
- Click the Restart now control for the Advanced startup option in the Recovery box.
- Pick Troubleshoot, Advanced options, and then Startup Repair on the new screen.
- Choose your account, then enter the necessary password (if one is set).
- Your best hope for “refreshing” Windows while still being able to keep your files is to reset this computer.
- Reset PC: by pressing the Windows key, then pressing Enter.
- Click the Reset PC button to select the Reset this PC option in the Recovery box.
- Pick the Keep my files option in the resulting window.
Windows 10
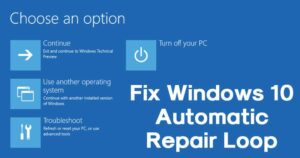
- Startup Repair: This option is for when your computer has startup problems.
- Use the methods listed below to access it. Also check How To Reset Amazon Fire Stick Remote
- Change advanced starting options can be found by pressing the Windows key, typing, and entering.
- On the Recovery tab, click.
- Click the Restart now button under Advanced starting on the right side.
- Pick Troubleshoot, Advanced options, and then Startup Repair on the new screen.
- Choose your account, then enter the necessary password (if one is set).
- Your best hope for “refreshing” Windows while still being able to keep your files is to reset this computer.
- Reset PC: By pressing the Windows key, then pressing Enter.
- On the Recovery tab, click.
- Click the Get started button next to Reset this PC on the right side.
- Select Keep my files in the resulting window.
- When your computer has problems starting up, choose Windows 8 Startup Repair.
- Use the methods listed below to access it.
- Change PC settings by pressing the Windows key, entering the text, then pressing Enter.
Windows 8
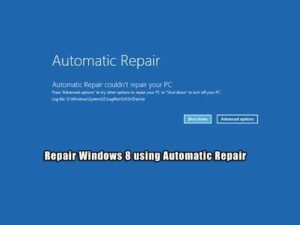
Startup Repair: Choose Update and Recovery, then Recovery, from the menu on the left-hand side of the PC Settings window.
- Click the Restart now button under Advanced starting on the right side.
- Pick Troubleshoot, Advanced options, and then Startup Repair on the new screen.
- Choose your account, then enter the necessary password (if one is set).
- The greatest option for “refreshing” Windows while retaining your files is to “reset this PC.”
- Change PC settings by pressing the Windows key, entering the text, then pressing Enter.
- Select General from the PC Settings window’s left side.
- Choose Refresh Your PC Without Affecting Your Files in the window’s lower right corner.
- Click Next after selecting the Get Started button.
- Insert the media you used to install Windows 8 if requested.
- Refresh by clicking the button. Also check Intermittent Fasting Apps
Windows Vista and 7

- Startup Repair: Use this option if your computer won’t start up properly.
- Use the methods listed below to access it.
- In your optical drive, place the Windows 7 or Vista disc.
- Watch for the Press any legend to boot from CD or DVD message when you restart or turn on your computer.
- To make Windows boot from the CD, press any key.
- Then click Next after selecting your language preferences.
- To repair your computer, select it.
- Click Next after selecting the operating system you want to repair.
- System Restore – Unlike the more recent versions of Windows, Vista and 7, there is no “refreshing” option.
- System Restore is the next best option.
- For problems not related to Windows starting up, choose this option.
- Select Start.
- Enter “System Restore” into the Start search box.
- Following processing, a window with two buttons at the bottom displays.
- Choose Next.
- The next screen often offers your most recent critical update and a recent restoration point.
- Select the Show additional restore points checkbox if you are aware of the exact day your issue first appeared.
- Click Next after selecting the appropriate restore point.
- Select a restoration point, then click Finish.
Windows XP

Repair Install – Using this method, Windows may be “refreshed” while retaining your files. Also check How to delete a Gmail account
Warning
Despite the fact that a repair installation shouldn’t change or remove any programmes or data, we still advise backing up any crucial files before moving further as a precaution.
- See How to back up your computer for guidance on data backup.
- Your Windows XP CD should be placed in the optical drive.
- Watch for the Press any legend to boot from CD or DVD message when you restart or turn on your computer.
- To make Windows boot from the CD, press any key.
- Enter is the key for installing Windows XP after the required drivers and files have loaded.
- Press F8 after reading the End-User License Agreement.
- Press R after choose which version of Windows you wish to repair (there is typically only one).
- Watch as Windows removes and instals the appropriate files across numerous screens.
- A popup with regional and language options should now appear.
- Choose Next.
- Give your machine a name, select Next, and watch as it boots up.
- Click Next on the Welcome to Microsoft Windows screen.
- Click Next after making your decision regarding whether or not to register.
- Click Next again after entering the username of each user you want to have access as.